My Scan Jobs
You have the option of scanning to the WebClient using the My Web scan destination. For each scan to My Web, you will receive an e-mail containing a link to the WebClient and a direct download link to the scan file which you can use to download the file directly.
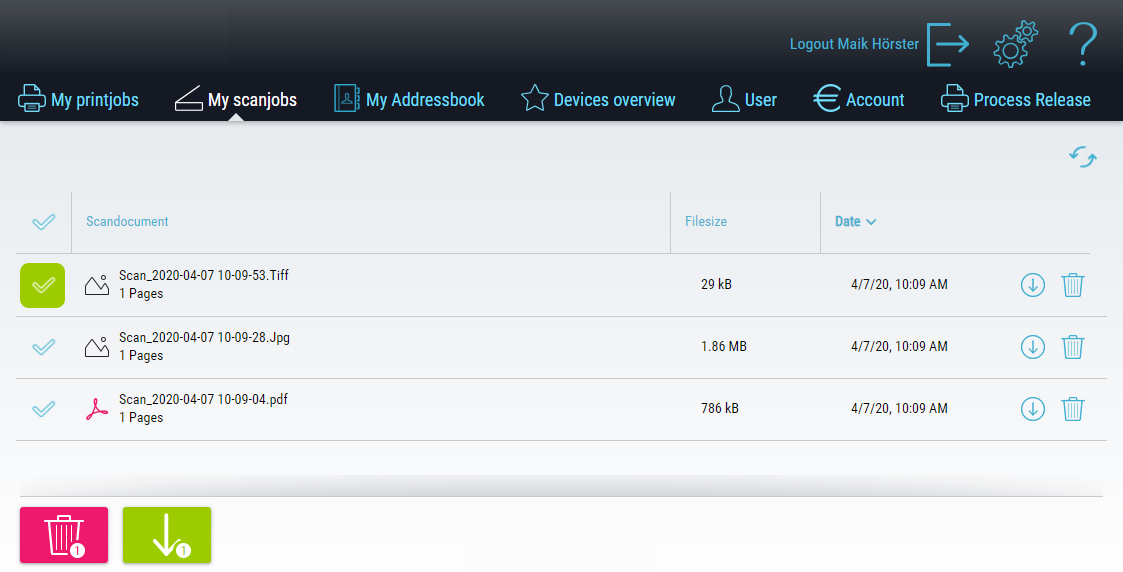
The My Scan Jobs menu shows you your scanned documents. The scan jobs are sorted chronologically by default with the most recent print job at the top. You can change the sort order at any time by clicking on the desired column identifier. Another click changes the sort direction.
The view adapts to the size of the browser window. Depending on the width of the window, columns will be pushed together or disappear completely.
 Jobs can be downloaded individually or several at once.
To download a single job, click the download icon in a row or the download button below the table.
If you want to download several jobs at once, select them at the beginning of the row and then use the download icon below the table. All selected jobs will then be combined in a zip archive and downloaded as one file.
 The Delete button deletes all selected scan files. The number of scans to be deleted is shown in a small font on the button. The confirmation dialog once again shows the names of the scan files to be deleted. Alternatively, you can delete individual jobs using the delete icon at the end of each line.
Scan jobs that are displayed in the WebClient have a configurable maximum runtime. After this time they are deleted automatically, see Storage time.
 If WebClient Upload is set up in the IQ4docs system, a "Scan Job" can be created using the + button. Of course, this is not a scan where a device scans paper, but instead means providing an image file. This is particularly practical when, for example, a photo is to be processed from a smartphone.
In the dialog box that opens, first select the document workflow to which the image file should be sent (only if this workflow has the destination My Web will the scan will be visible in the list of scan jobs afterwards, otherwise it will be placed in a directory according to the workflow, sent by e-mail or similar).
Then select the image file. The following image file types are allowed:
- TIFF (Tagged Image File Format)
- PNG (Portable Network Graphic)
- JPG (image format of the Joint Photographic Experts Group)
 The Settings button takes you to your personal settings, where you can set the language. After logging in, the system automatically switches to the language you have set.
 To log out, you can press the Logout icon located in the upper right corner of each dialog. This will take you back to the default login screen (which one that is can be set under Set authentication methods).